
Floating shelves are a popular DIY project, offering a sleek, modern look and space-saving design; With free PDF plans, you can easily create sturdy, customizable shelves for any room, guiding you through materials, tools, and installation steps to achieve professional results at home.
What Are Floating Shelves?
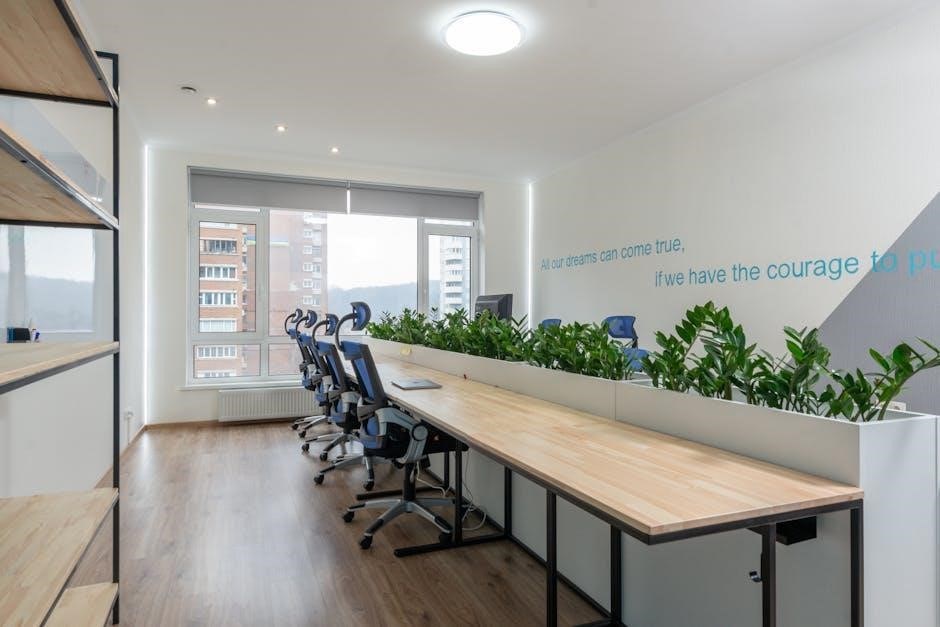
Floating shelves are sleek, modern storage solutions that appear to hover on walls without visible supports, creating a minimalist aesthetic. They are typically made from wood, MDF, or other materials, offering a versatile way to display decor or store items. These shelves are cost-effective and easy to install, providing a clean look that complements any room’s design. Their hidden support system ensures stability, making them both functional and visually appealing. Whether rustic or modern, floating shelves are a practical and stylish addition to home decor, suitable for various spaces and budgets.
Why Build Floating Shelves?
Building floating shelves is a cost-effective and creative DIY project that enhances home decor. They provide additional storage without cluttering the space, making them ideal for small rooms. Floating shelves are customizable, allowing you to choose materials and finishes that match your style. This project is also a great way to improve your DIY skills and add value to your home. With easy-to-follow PDF plans, you can create sturdy, visually appealing shelves that serve both functional and aesthetic purposes, making them a rewarding and practical home improvement option.
Benefits of Using PDF Plans
PDF plans for floating shelves offer clear, detailed instructions and diagrams, ensuring accuracy and ease of use. They provide step-by-step guides, material lists, and measurements, making the project accessible for all skill levels. PDFs are easily downloadable and printable, allowing you to reference them anytime, even offline. They often include photos and tutorials, helping you visualize and execute each step flawlessly. With PDF plans, you can save time, avoid mistakes, and achieve professional-looking results, making your DIY project enjoyable and stress-free from start to finish.
Materials and Tools Needed
Essential materials include high-quality wood boards, wall brackets, screws, and wood glue. Tools like drills, saws, measuring tapes, and stud finders are necessary for precise installation. Proper materials ensure durability, while the right tools guarantee a professional finish and secure fitting. Always choose materials that match your desired aesthetic and structural needs for the best results.
Essential Materials for Floating Shelves
The primary materials needed are high-quality wood boards (such as solid wood, MDF, or plywood) for the shelf top and supports. Wall brackets or hidden support systems are crucial for stability. Screws, wood glue, and sandpaper are essential for assembly and finishing. Additional materials like paint or stain can enhance the appearance. Ensure all components are durable and suitable for the intended weight load. Proper material selection guarantees both functionality and aesthetics, making your floating shelves sturdy and visually appealing.
Tools Required for the Project
Essential tools include a drill for creating pilot holes and driving screws, a saw for cutting wood to size, and a stud finder to locate wall studs. Sandpaper is needed for smoothing surfaces, and a level ensures proper alignment. A measuring tape is crucial for accurate cuts and placements. Clamps can help hold pieces in place while gluing or fastening. Optional tools like a router or sander can enhance the finish. Having these tools on hand ensures a smooth and efficient assembly and installation process for your floating shelves.
Optional Materials for Customization
Optional materials for customization include decorative trim, metal brackets, or molding to add unique details; Paint or stain can enhance the shelf’s appearance, matching your home’s style. Glass or marble tops offer a sleek, modern look, while lighting kits provide ambiance. Decorative hardware, like brass or chrome screws, can add visual interest. Reclaimed wood or distressed finishes create a rustic vibe. These materials allow you to personalize your shelves, making them stand out and blend seamlessly with your interior design for a truly custom look.
Step-by-Step Installation Guide
Install floating shelves by measuring the wall, marking stud locations, and creating a support system. Attach the shelf to the wall using hidden brackets, ensuring it’s level and secure for a professional finish.
Measuring and Marking the Wall
Start by determining where you want the shelf, ensuring it aligns with your space’s aesthetic. Use a stud finder to locate wall studs for secure installation. Measure the width of your shelf and mark the wall accordingly, ensuring it’s level. Lightly pencil the area where the brackets will go, double-checking your measurements for accuracy. This step is crucial for a sturdy and visually appealing installation, as improper alignment can lead to an uneven shelf or weakened support. Precision here sets the foundation for a successful project.
Creating the Support System
The support system is vital for stability. Use a ladder frame or horizontal brackets to distribute weight evenly. Cut 1×4 or 1×6 wood spacers to fit behind the shelf, ensuring proper alignment with wall studs. Attach these spacers securely using screws, forming a sturdy base for the shelf. For added strength, consider using hidden brackets or cleats that will be concealed once the shelf is mounted.
Customize the system by adjusting spacer lengths or adding supports for heavier items. Sand and finish the frame before installation for a polished look; This step ensures your shelf remains secure and level, ready for final attachment.
Attaching the Shelf to the Wall
Align the shelf with the pre-installed support system, ensuring it is level and evenly spaced. Use a drill to create pilot holes in the shelf’s underside, matching the wall studs or brackets. Secure the shelf using 2.5-inch wood screws, tightening firmly but avoiding overtightening to prevent wood splitting. For added stability, clamp the shelf in place while screwing to maintain alignment. Double-check the fit and ensure no gaps remain for a seamless, floating appearance. This step is crucial for ensuring the shelf remains sturdy and level over time.
Securing the Shelf in Place

Once the shelf is attached to the wall, ensure it is tightly fastened by checking for any gaps or movement. Use clamps to hold the shelf firmly while screwing it into place. Apply gentle pressure to test stability, ensuring the shelf does not wobble. For added security, consider using wood adhesive on the back of the shelf before attaching it to the wall. This creates a strong bond and prevents shifting over time. Double-check all screws are tightened evenly and the shelf is perfectly aligned for a sturdy, professional finish.

Design and Customization Options
Floating shelves offer endless customization possibilities, from choosing wood types to adding finishes. Adjust lengths and thicknesses to suit your space, ensuring a perfect fit and style.
Choosing the Right Wood Type
Selecting the right wood type is crucial for floating shelves as it affects both appearance and durability. Popular options include solid wood (like pine, oak, or maple) for a rustic or modern look, and MDF for a smoother, more affordable finish. Consider the desired aesthetic, budget, and durability needs. Pine offers a budget-friendly, knotty charm, while oak provides a classic, sturdy option. Maple and cherry woods deliver a sleek, modern appearance. MDF is ideal for a uniform look but requires sealing for moisture protection. Choose a wood that aligns with your space and style preferences.
Adding a Rustic or Modern Finish
Enhance your floating shelves with a rustic or modern finish to match your decor. For a rustic look, distress the wood, apply a natural stain, or leave it unfinished for a charming, vintage feel. To achieve a modern aesthetic, use a sleek paint finish or a clear coat to highlight the wood grain. Sanding and staining create a smooth, polished appearance, while whitewashing adds a light, airy vibe. Personalize the finish to complement your room’s style, ensuring the shelves blend seamlessly with their surroundings for a cohesive and stylish result.
Customizing the Shelf Length and Thickness
Customizing the length and thickness of your floating shelves allows you to tailor them to your space and needs. Use standard wood sizes like 1×4, 1×6, or 1×8 boards for a sleek look, or opt for thicker slabs for a more robust appearance. Adjust the length to fit specific areas, ensuring the shelves are proportional to the wall and items they’ll hold. Thinner shelves are ideal for light decor, while thicker ones provide a sturdy, modern aesthetic. This customization ensures your shelves complement both the room’s style and functionality, offering a personalized touch to your DIY project.

Budget-Friendly Tips
Save money by using reclaimed wood, shopping for discounted lumber, or opting for thinner shelves. DIY hardware solutions and repurposing materials can significantly reduce costs while maintaining quality.
Reducing Material Costs
Minimize expenses by using reclaimed or recycled wood, which is often cheaper and adds a rustic charm. Shop during sales or opt for thinner shelf boards to cut costs without sacrificing durability. Consider using dowel rods instead of expensive brackets for support. Additionally, repurpose materials like old furniture or pallets to create unique floating shelves. Planning your project around available materials can significantly lower expenses while maintaining a professional finish. These strategies help you build functional and stylish shelves on a budget;
DIY Hardware Solutions
Save money by creating your own hardware using dowel rods or hidden brackets. This approach keeps the shelves looking clean while maintaining strength. Cut dowels to fit between the wall and shelf, securing them with screws for a sturdy support system. You can also repurpose metal brackets by attaching them behind the shelf, ensuring they remain invisible. These DIY solutions are cost-effective and blend seamlessly with your shelf design, offering both functionality and elegance without the need for expensive store-bought hardware.
Reusing or Repurposing Materials
Reusing or repurposing materials is a cost-effective and eco-friendly way to build floating shelves. Consider using reclaimed wood from old furniture or pallets, which can be refinished or repainted to match your decor; For example, wooden crates or planks can be transformed into unique shelves. Additionally, repurpose metal brackets or dowels as hidden supports to minimize hardware costs. Always ensure the materials are sturdy enough to hold weight and measure them to fit your space. This approach not only saves money but also adds a personal touch to your project, making it both functional and environmentally conscious.

Safety Considerations
Ensure weight limits are not exceeded and use proper safety gear. Always check for wall studs and use level tools. Work safely on ladders and avoid overreaching.
Ensuring Weight Capacity
Ensuring weight capacity is crucial for safe and durable floating shelves. Start by calculating the maximum load based on shelf size and material strength. Use sturdy materials like solid wood or MDF, and install high-quality wall anchors or brackets. Avoid overloading by distributing weight evenly and securing shelves to wall studs. Test the shelf gently before placing heavy items, and consider reinforcing longer shelves with additional support. Proper installation and material choice ensure your shelves remain stable and secure, preventing potential damage or collapse.
Proper Use of Power Tools
Proper use of power tools is essential for safety and precision when building floating shelves. Always wear safety goggles and gloves to protect yourself. Ensure tools are set to the correct settings for your materials, and maintain a firm grip to avoid accidents. Use clamps to secure wood during cutting or drilling to prevent movement. Keep work areas well-lit and clear of debris. Avoid over-reliance on power tools; hand tools can often provide more control for precise tasks. Follow manufacturer guidelines for tool maintenance and operation to ensure optimal performance and longevity. Regular breaks can help prevent fatigue-related mistakes.
Working Safely at Heights
When installing floating shelves, working safely at heights is crucial. Always use a sturdy ladder or step stool and ensure it is securely positioned. Have someone hold the ladder for added stability. Plan your installation to minimize time spent at heights by pre-drilling holes and preparing materials on the ground. Wear non-slip shoes and avoid overreaching, as this can cause loss of balance. Keep the area clear of clutter to prevent tripping hazards. If possible, work with a partner to provide additional support and assistance during the process.
Advanced Techniques
Explore sophisticated methods like hidden compartments, integrated lighting, and multi-level designs to elevate your floating shelves. These techniques enhance functionality and aesthetics, offering a polished, professional finish.
Building Floating Shelves with Hidden Compartments
Adding hidden compartments to floating shelves offers a clever way to store small items while maintaining a sleek appearance. Start by modifying your shelf design to include a false bottom or secret drawer. Use hinges and magnetic catches to create an accessible yet concealed space. Measure carefully to ensure the compartment fits seamlessly within the shelf structure. Materials like plywood or MDF work well for the hidden section. Install the compartment before attaching the shelf to the wall for easier access. This feature adds functionality while keeping the modern aesthetic intact. Customize the size and placement based on your storage needs for a practical and stylish solution.
Integrating Lighting into Shelves
Enhance the functionality and aesthetics of floating shelves by integrating lighting. LED strip lights can be installed under the shelf for a modern glow, while puck lights can highlight decorative items. Solar-powered options are eco-friendly and easy to set up. Hardwired lighting provides a sleek, permanent solution. Plan the placement of lights during the shelf design phase to ensure proper wiring and a seamless look. Use dimmers for adjustable brightness. Hide wires using cable management systems for a clean finish. This feature transforms shelves into a striking focal point, perfect for showcasing treasures or creating ambiance in any room.
Creating Multi-Level Floating Shelves
Multi-level floating shelves add dimension and maximize storage in small spaces. Plan the design by measuring the wall and determining the number of levels. Cut the shelves and supports according to the plan. Assemble each level separately, ensuring alignment and stability. Use hidden brackets or cleats for support, attaching them securely to wall studs. Stack the levels evenly, leaving space between them for a clean look. Sand and finish the shelves before installation. This design is perfect for displaying decor, books, or kitchenware, creating a practical and visually appealing storage solution for any room.

Free PDF Plans and Resources
Discover free PDF plans for floating shelves online, offering step-by-step guides, material lists, and diagrams. Websites like Ana-White.com provide downloadable templates and video tutorials for easy DIY projects.
Where to Find Free Floating Shelf Plans
Free floating shelf plans can be found on websites like Ana-White.com, Housegrail.com, and YouTube channels such as Insider Carpentry. These resources offer downloadable PDF templates, step-by-step guides, and video tutorials. Many DIY blogs provide detailed instructions, material lists, and customizable designs. Sawdust Sisters and similar platforms share heavy-duty plans with rustic or modern finishes. Social media and forums like Pinterest and Reddit also host communities where users share their plans and experiences, making it easy to find inspiration and practical advice for your project.
Downloading and Printing PDF Templates
Downloading and printing PDF templates for floating shelves is straightforward. Visit websites like Ana-White.com or Housegrail.com, which offer free, downloadable plans. Ensure your printer settings match the template’s dimensions, typically 8.5×11 inches. Print on high-quality paper for clarity. Many templates include a materials list and step-by-step instructions. For accuracy, verify measurements before cutting materials. Some plans also offer adjustable sizes, allowing customization to fit your space. Always review the PDF for any specific printing instructions to ensure the best results for your DIY project.
Using Online Tutorials for Guidance
Online tutorials provide comprehensive guidance for building floating shelves, offering step-by-step instructions and video demonstrations. Websites like Sawdust Sisters and Ana-White.com feature detailed tutorials with materials lists and customization tips. These resources help DIY enthusiasts achieve professional-looking results, ensuring shelves are both functional and visually appealing. Many tutorials include tips for avoiding common mistakes, such as improper measurements or hardware visibility. By following these guides, you can confidently construct and install floating shelves tailored to your space, enhancing your home decor with a modern, sleek design.

Troubleshooting Common Issues
Common issues like uneven shelves, hardware visibility, or warping can be resolved with proper alignment, hidden supports, and ensuring weight limits. Addressing these ensures stability and longevity.
Fixing Uneven Shelves
Uneven shelves can be corrected by checking the wall studs and ensuring the shelf is properly aligned. Use shims or spacers to level the shelf, adjusting as needed. If the issue persists, verify the support system and hardware installation. Tightening screws or adding extra brackets can stabilize the shelf. For severe cases, consult the PDF plans for precise measurements and consider reattaching the shelf for better balance. Regular checks and adjustments will prevent future unevenness and ensure a sturdy, professional-looking installation.
Dealing with Hardware Visibility
Visibility of hardware can detract from the floating shelf’s aesthetic. To minimize this, use concealed brackets or hidden supports, as detailed in PDF plans. Choose hardware with a finish that blends with the shelf material. Applying wood filler to screw holes and sanding smooth can hide fasteners. For a seamless look, paint or stain the shelf after installation, ensuring hardware is fully covered. These techniques maintain the sleek, modern appearance of floating shelves while providing necessary structural support, as shown in various DIY guides and video tutorials online.
Addressing Warping or Bending
Warping or bending can occur due to improper installation or uneven surfaces. To fix this, ensure shelves are made from dry, sturdy materials and walls are level. Use high-quality wall anchors to prevent bending and distribute weight evenly. If warping occurs, lightly sand the affected area or adjust the shelf’s position. For severe cases, reinforce the shelf with additional support brackets. Always follow PDF plans for material recommendations and installation techniques to minimize the risk of warping or bending, ensuring your floating shelves remain stable and visually appealing over time.
Building floating shelves is an easy and rewarding DIY project that enhances space and style. With the right PDF plans, you can create sturdy, elegant shelves to elevate your home decor. Start your project today and enjoy the satisfaction of custom storage solutions tailored to your needs!
Final Tips for Successful Installation
For a flawless floating shelf installation, ensure all measurements are precise and align with wall studs for maximum support. Pre-drill holes to avoid wood splits and use high-quality hardware. Sand and finish the shelves before mounting for a polished look. Apply even pressure when securing the shelf to the wall, and double-check the level to maintain stability. Following these steps ensures a sturdy, professional-grade result that enhances your space with minimalist charm and functionality.
Maintenance and Care of Floating Shelves
To keep your floating shelves looking their best, regular cleaning is essential. Dust the shelves with a soft cloth and avoid harsh chemicals that may damage the finish. For wooden shelves, periodically apply a wood conditioner or polish to maintain their luster. Avoid placing heavy or sharp objects directly on the shelves to prevent scratches or warping. Ensure the shelves remain dry to avoid moisture damage, especially in humid environments. Regularly inspect the shelves and their supports for stability and tighten any loose screws if necessary. Proper care extends the lifespan and preserves the aesthetic appeal of your floating shelves.
Sharing Your Project and Getting Feedback
Sharing your floating shelf project online allows you to showcase your creativity and receive valuable feedback. Platforms like Instagram, Pinterest, and DIY forums are great for posting photos and descriptions of your work. Engage with online communities by explaining your process, materials used, and challenges overcome. Many enthusiasts appreciate detailed posts, which can inspire others and help refine your skills; Constructive feedback from experienced DIYers can provide insights for future projects, enhancing your craftsmanship and problem-solving abilities. Sharing also fosters a sense of accomplishment and connection within the DIY community.